|
Music Studio |
|
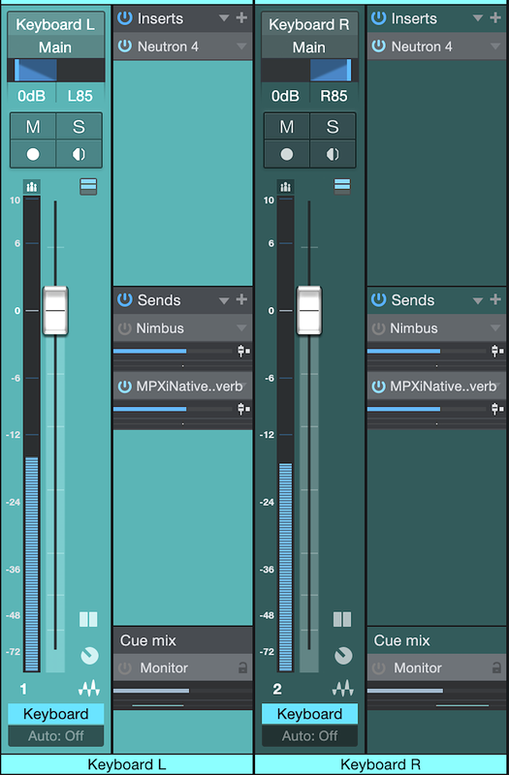
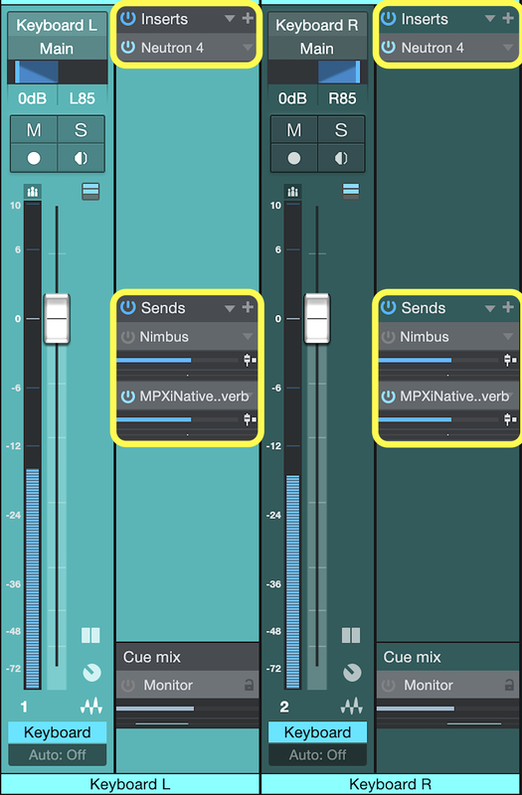
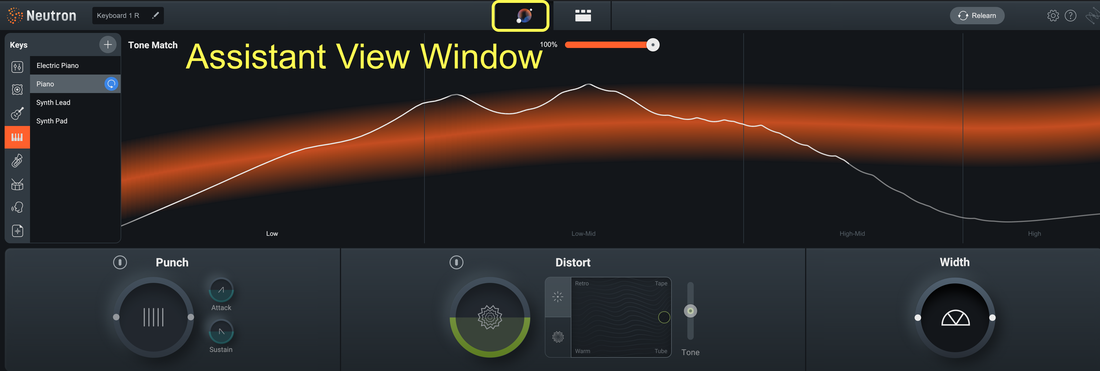
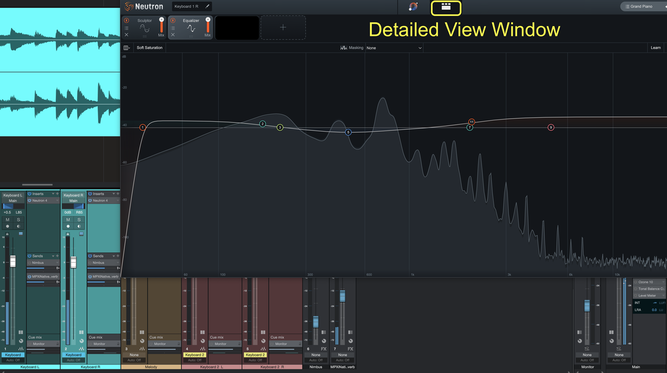
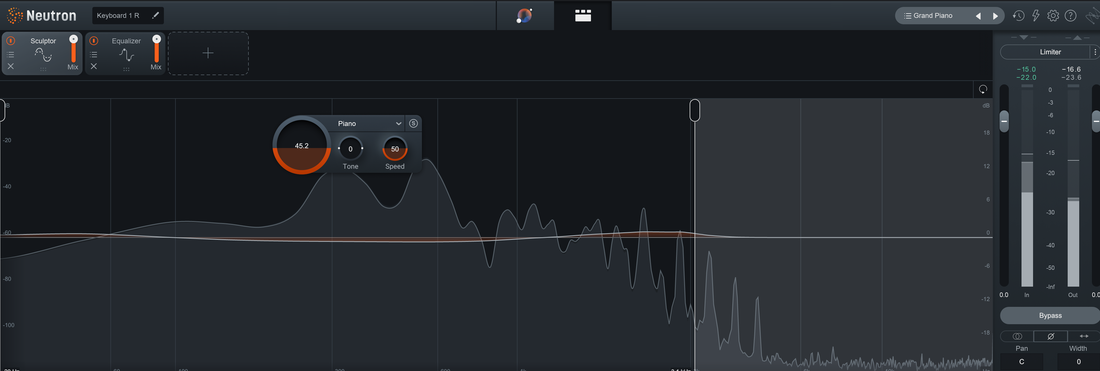
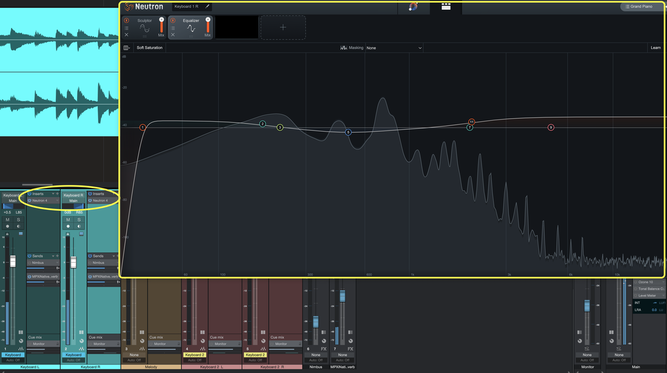
In this post, the second of four, I’ll talk about the mixing step in the creation of the musical recording of Bach’s Adagio in D minor for keyboard solo. There are just two tracks in this recording – the left and right outputs of the digital piano. Rather than recording the piano to a single stereo track, I obtain more flexibility to process the left and right channel signals independently by recording to two mono tracks. The mixing console for these two channels is shown in the figure at the top of this post. The input gains of the audio interface amplifiers have been set and the input gains of the digital audio workstation (DAW) have been trimmed to achieve the proper volume balance between the left and right channels in the recorded waveforms. Therefore, there is no need to adjust the volume faders of both channel strips, and they are set at 0 dB. For imaging the signals to the stereo Main Output bus, I have set the left channel to 85% pan left and the right channel to 85% pan right. I don’t pan the left and right channels to hard left and hard right, respectively. This is because I will be using some additional stereo field imaging in the mastering process – more about this in the next post. The most artistic part of the mixing process comes from the signal processing that is applied to each channel. Equalization and dynamics processing plug-ins from the iZotope Neutron 4 suite of professional mixing tools are included in the Insert sections of the channel strips. And the time-based effects (Reverb) plug-in from Lexicon is included in the Sends sections of the channel strips. These Insert and Sends sections can be seen below in the channel strips of the DAW mixer console. Inserts The iZotope Neutron 4 mothership plug-in comprises a suite of signal processing plug-ins combined with artificial intelligence (AI) assistive audio technology for crafting a professional mix. iZotope is one of the, if not the , leading signal processing software developers in the music production industry today. It is the “go to” source for many professional music studios, and I have come to appreciate how amazing these plug-ins are in a home music studio too. The process begins with invoking the AI-powered Assistant to make a “first cut” putting together a signal processing chain of plug-ins based on your desired sound intent for tonal and dynamic balance. This is shown below in the Assistant View Window of the Neutron 4 insert. The user sets the intent controls of Tone Match, Punch, Distort, and Width, and the AI Assistant configures a chain of signal processing plug-ins that works toward achieving the desired tonal, dynamic, character, and width targets. The Punch, Distort, and Width intent controls are connected to Compressor (affecting signal transients), Exciter (creating harmonic distortion), and Imager (adjusting stereo field width) plug-in modules, respectively. I don’t need these for my Bach Adagio piano tracks. But the Tone Match intent control is useful to me. The Tone Match slider controls two parameters simultaneously: (1) the Assistant Pre-EQ control in the Neutron mothership plug-in, and (2) the Amount control found in the Sculptor plug-in module. Both controls work together to shape the input signal towards the selected tonal balance target or custom reference curve in the Target Library. Once the Assistant has created a “starting point” in your mix, you can switch over to the Detailed View Window to see and make adjustments in the various plug-in modules. Sculptor Plug-in Module The first plug-in is the Sculptor module, which is a very powerful signal processing tool. It is described by iZotope as follows: “Sculptor is a spectral-shaping tool that brings clarity and polish to your tracks. This means removing muddiness, reducing harshness, and helping shape your tracks into better versions of themselves. Spectral shaping is multiband compression taken to the extreme. Instead of compressing four frequency bands, spectral shaping compresses the signal in up to 32 frequency bands, allowing for a control that is more tailored for the signal. Compression thresholds can be set toward a desired spectral shape or remain adaptively adjustable to compress the signal “toward itself”, i.e. its own time-averaged spectral shape. Sculptor will apply dynamics processing to areas within the frequency spectrum based on a threshold aimed at hitting the selected target curve. The target curves are the idealized spectral version of the selected instrument. Sculptor is designed specifically not to add any distortion, preserving the integrity of the original signal as transparently as possible.” The topic of Compression – what it is and why it is used – has been covered in a previous post. The Sculptor multiband compression module that is used on the piano tracks in this recording is shown below. EQ Plug-in Module The second plug-in is a static Equalization (EQ) module. The topic of Equalization – what it is and why it is used – has also been covered in a previous post. The EQ module used on the piano tracks in this recording is shown below. Spectral refinements appropriate for a grand piano include a sub-bass roll-off, low-frequency boost, low-mid frequency cut to remove muddiness, and high-frequency boost to add clarity and airiness. Sends Reverb FX Time-based effects (Reverb) is added to the mix using the classic Lexicon MPX-i Native Reverb plug-in. This Reverb FX is shown below. Adding Reverb to your mix puts listeners in a certain space, controlling where they are in relation to the music. Reverb is often described as adding warmth or ‘wetness’ to the sound. Less reverb on a track brings out the direct sound, bringing the instrument ‘up front’ and making it clear and present. More reverb on a track increases the depth of the sound, pushing the instrument ‘to the rear’ and making it distant and dreamy. The Bach Adagio in D minor is somber, expressive, even a bit dark, with a melancholy melodic line over a slowly plodding basso continuo. This brings to mind being in a darkened, large open reverberant space when hearing this music. It is fitting, therefore, to set the Reverb parameters to reflect this listening environment. For this recording, the Lexicon MPX-i Reverb Preset “Dark Recital Hall” provides a reverb time of 1.7 seconds, 80% diffusion, and a dark coloration. In the next post, I’ll talk about the mastering step in the creation of the musical recording of Bach’s Adagio in D minor for keyboard solo.
|
Categories
All
Archives
May 2023
|
 RSS Feed
