|
Music Studio |
|
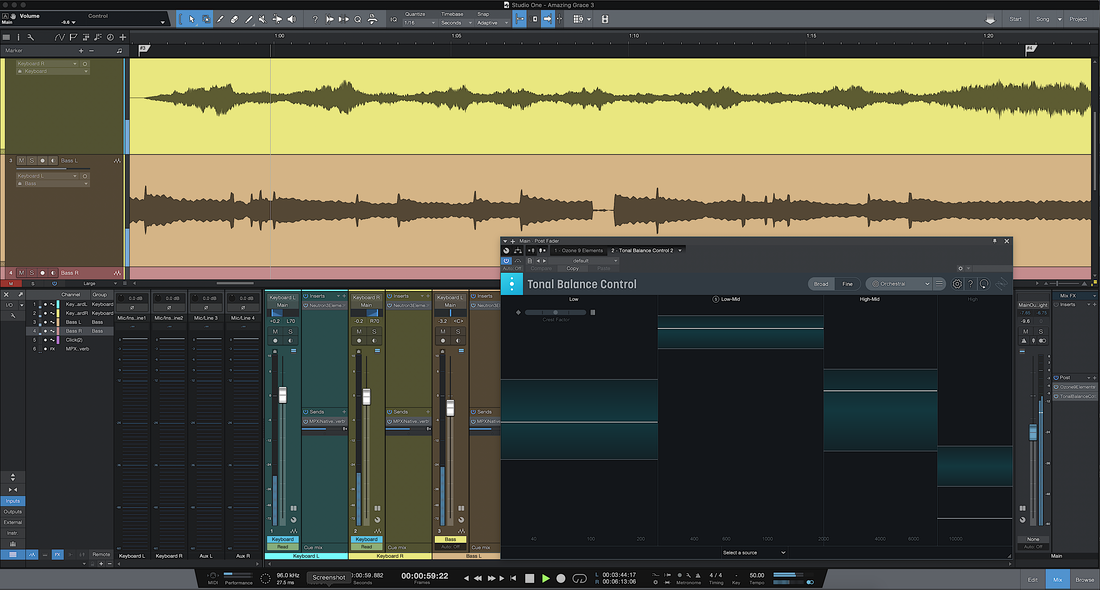
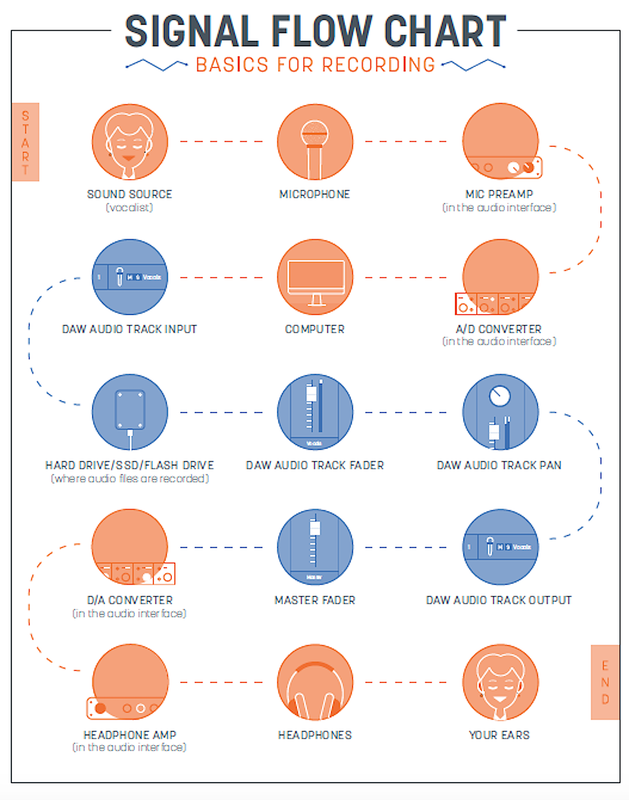
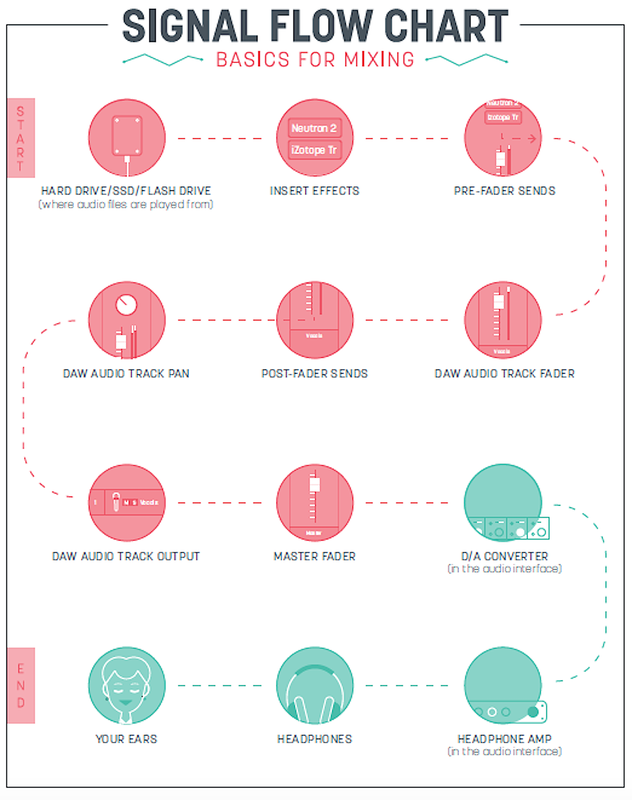
An “inside-the-box” recording system relies on a sophisticated software application, called the Digital Audio Workstation (DAW), to perform the critical functions of music production: recording, editing, signal processing, mixing, and mastering. There are many DAW packages available to musicians, ranging from free “lite” versions (Audacity, Apple GarageBand) for the home hobbyist to expensive full-scale versions (Avid Pro Tools) for the professional studio engineer. Here’s a short list of the most widely used and highly rated DAWs: PreSonus Studio One Ableton Live Image-Line FL Studio Steinberg Cubase Apple Logic Pro Avid Pro Tools The PreSonus Studio One is rapidly becoming a DAW that can rival the versatility and power of the Avid Pro Tools, but with a simpler learning curve and easier workflow. The latest release, Studio One 5, is bringing this DAW into the realm of industry-standard music production software. Working with Studio One is amazing – it is easy to learn, runs incredibly well (rarely, if ever, crashes), and has so many useful and powerful features. Essentially, anything I want to do, Studio One can do it. In fact, there is more capability in this DAW than I will ever know. Signal Flow in a DAW The signal flow in the DAW is important to understand in order to utilize the software properly. Unlike hardware components where you can visualize the signal flow in a system by the cables connecting the parts, signal flow in the software programming is not readily apparent to the user. Fortunately, a simple block diagram of the signal flow in a DAW is available for download from iZotope . The flow chart for recording is shown below. In the computer, the digital audio signal enters the DAW audio track input section, where input gain and phase shifts can be adjusted. It should be noted that the primary adjustment for recording level is usually done back at the analog pre-amplifiers in the audio interface unit. But the level of the digital signal can be adjusted at this point, just prior to the audio digital bits being recorded to the Hard Drive/SSD/Flash Drive. In the flow chart, the Hard Drive is the “final” destination of the signal in the recording process. All the remaining elements on the chart following the Hard Drive/SSD/Flash Drive are concerned with the monitoring process, and have no effect on the recorded audio files. For example, the DAW audio track fader does not affect the amplitude level of the recorded signal. This monitoring process during a recording session was discussed in the previous post on latency. The signal flow chart for mixing is shown below. Here, the signal flow mirrors the flow down the track strip of a hardware mixing console. Playback of a track originates from the recording on the hard drive. The signal then passes through these basic elements of signal processing and mixing: Insert Effects: Dynamics and Equalization Processing Audio Track Fader: Level Control Pre- and Post-Fader Sends: Time-Based Effects Audio Track Pan: Stereo Image Processing Main Output Bus: Stereo Mix Master Fader: Main Output Level Control Main Output Bus: Mastering Effects The final mixed digital signal leaves the computer and returns to the audio interface unit, where it is converted to an analog signal. The basic elements of signal processing and mixing listed above will be the subject of future posts. There is, however, another step in the music production workflow that exists during and after the recording process – editing. I’ll give a brief overview of editing in my next post.
|
Categories
All
Archives
May 2023
|


 RSS Feed
