|
Music Studio |
|
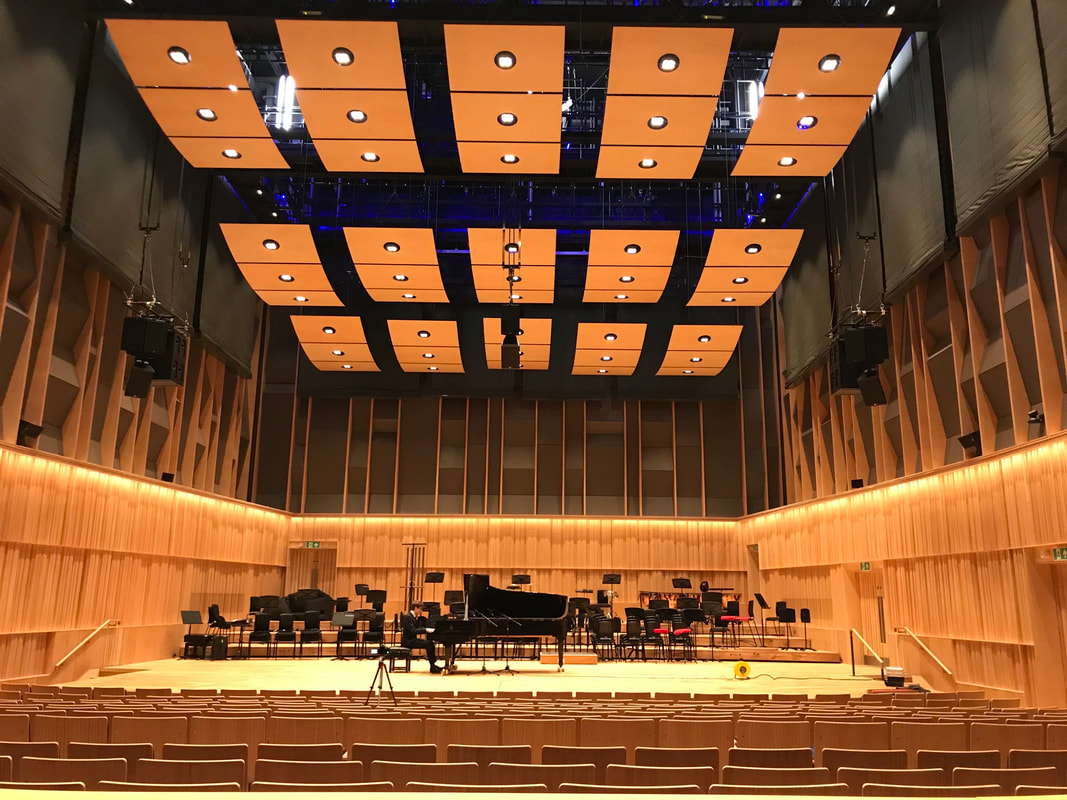
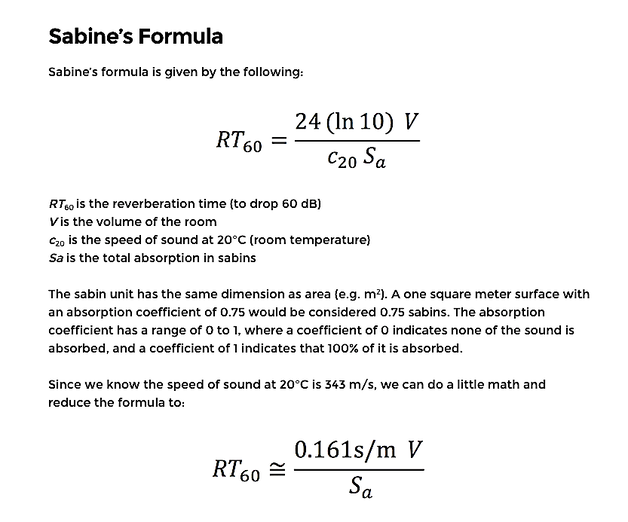
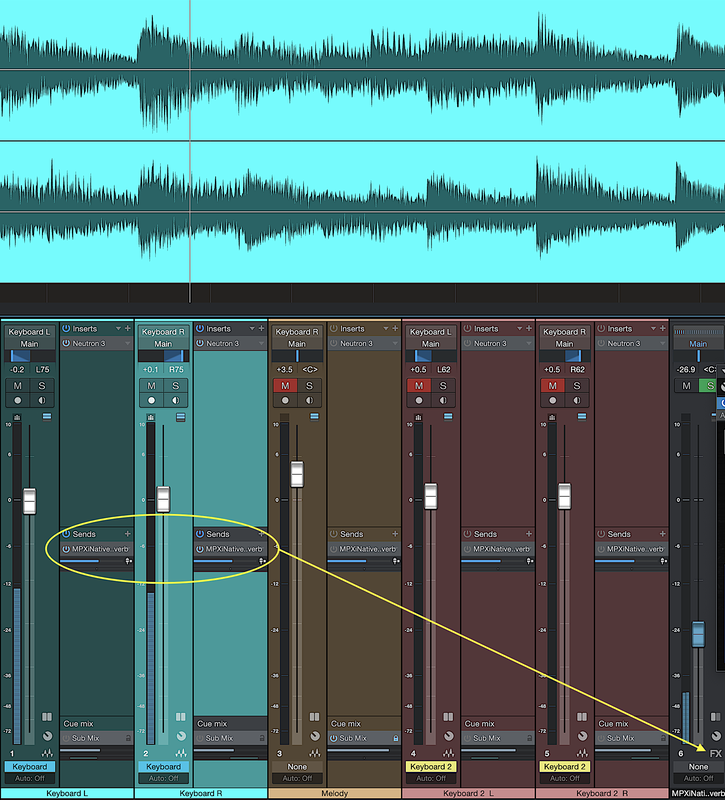
In the previous two posts on Equalization (EQ) and Compression, we talked about achieving balance in tone and dynamics in the mixing process. In this post, we’ll take a brief look at a time-based effect, Reverberation, that works to bring spatial balance to the mix. We listen to music in space – acoustic waves reaching our ears from the immediate environment around us. The spatial aspect of sound can be simply characterized by its width and depth. The width is primarily associated with the stereo image – Left/Right or Mid/Side – and is balanced using panning on individual tracks and using stereo image enhancing plug-ins. The depth of the sound is mostly associated with the time-domain delay of the sound reaching our ears. Depth gives us a feeling of the size and character of the space, e.g., a stone cathedral versus a small living room. Sound waves reach us by three “paths” : 1. Direct. This is the direct ‘line of sight’ from source to receiver. 2. Low-order Reflection. This occurs when sound waves from the source undergo one or two reflections before reaching the receiver. 3. Multiple Reflections. This occurs when sound waves from the source undergo many reflections before reaching the receiver. Direct waves arrive at the receiver first in time. Reflected waves arrive at the receiver at delayed times, since they travel different distances. The nature of the reflections plays a key role in determining how long the sound will reverberate in the space. For example, reflections from a smooth flat hard surface will be very different from reflections from an irregularly-shaped absorptive surface. In the field of acoustics, the Sabine equation gives an approximate “reverberation time” (time for the sound level to decay by 60 dB). This simple equation depends on the volume of the space, the surface area of the enclosure, and the various wall material absorption coefficients. For great music concert halls, such as Carnegie Hall and Boston Symphony Hall, reverberation time RT is on the order of 1.5 – 2.0 seconds. Adding Reverb to your mix puts listeners in a certain space, controlling where they are in relation to the music. Reverb is often described as adding warmth or ‘wetness’ to the sound. Less reverb on a track brings out the direct sound, bringing the instrument ‘up front’ and making it clear and present. More reverb on a track increases the depth of the sound, pushing the instrument ‘to the rear’ and making it distant and dreamy. Reverb should be used sparingly, since too much reverb ‘muddies’ the tonal balance. Reverb plug-ins often have built-in EQ that reduces the low-mid frequencies to lessen this muddiness. In your mixer console, Reverb is applied to the music by creating a bus FX (Reverb) channel and using AUX Sends from your instrument channels to this bus FX channel. Typically, these AUX Sends are post-fader sends, i.e., the signal sent to the FX bus is after the fader adjustment of the channel volume level. This assures that the “Wet/Dry” mix of the signal remains at a fixed ratio for any changes in the channel fader position. An example of AUX Sends to the FX bus in the PreSonus Studio One DAW mixer is shown below. The output of the Reverb channel goes to the Main output bus and is mixed with the instrument channels there. There are many different Reverb plug-ins available from a host of audio FX developers. The digital signal processing performed in the Reverb software is based on either algorithmic or convolution computations. The algorithmic approach uses mathematical ‘formulas’ to synthesize delayed waves that are similar to those that occur in acoustic environments. An algorithmic Reverb plug-in requires only moderate CPU processing power. The convolution approach uses actual sampled impulse responses of real acoustic environments to calculate the response of the system (the acoustic environment) to the driving source waves. (This mathematical calculation is based on the convolution integral of Green’s functions.) The big advantage of a convolution Reverb plug-in is that it accurately produces the natural sound of real acoustic environments. The drawback, however, is a huge computational burden on CPU processing power. The Reverb plug-in that I use is a very simple one – the classic Lexicon MPX Native Reverb (an algorithmic reverb). There are one-hundred Reverb presets to choose from – this allows you to “dial in” a descriptive spatial quality without having to adjust all the individual parameters. Examples of presets include “midnight chamber” (in figure above), “stone cathedral”, and “large living room” . The main parameters to adjust when using any Reverb plug-in on a track are: Reverb Type: different sizes of Hall, Chamber, Room, Stage, Theatre, Church, or Cathedral. Pre-delay: time between the arrival of the direct sound from the source and the arrival of the first sound reflection. (milliseconds) Reverb Time: time for the amplitude of the sound reflections to decay by 60 dB. (seconds) Diffusion: amount of dispersion of the sound waves due to complex surface shapes in the space – leads to many reflections arriving at the receiver over a full 2-π steradian solid angle. Increasing diffusion has a smoothing and thickening effect on the reverberation. Reducing diffusion tends to separate discrete reflections in time, giving a more open sound (echoes). Wet/Dry Mix: percentage mix of the “wet” signal (with reverb) to the “dry” signal (without reverb). Since we are using an FX bus channel to send the reverb (wet) signal to the Main output bus where it mixes with the original (dry) signal, we adjust the wet/dry mix using the Aux Send level control and FX bus channel fader. Therefore, we can set the wet/dry mix parameter of the Reverb plug-in unit to 100% . There are other time-delay effects based on replications of the signal that can be applied, such as delay, flanging, doubling, and chorus. Reverb, in my opinion, is the most “natural” effect, as it mimics the acoustics of real listening environments. Careful and intentional application of Reverb to your mix will greatly enhance the presence and liveliness of your music. In the next post, we’ll continue along the signal processing path in the mixer console channel strips to the panning and volume fader controls.
|
Categories
All
Archives
May 2023
|


 RSS Feed
