|
Music Studio |
|
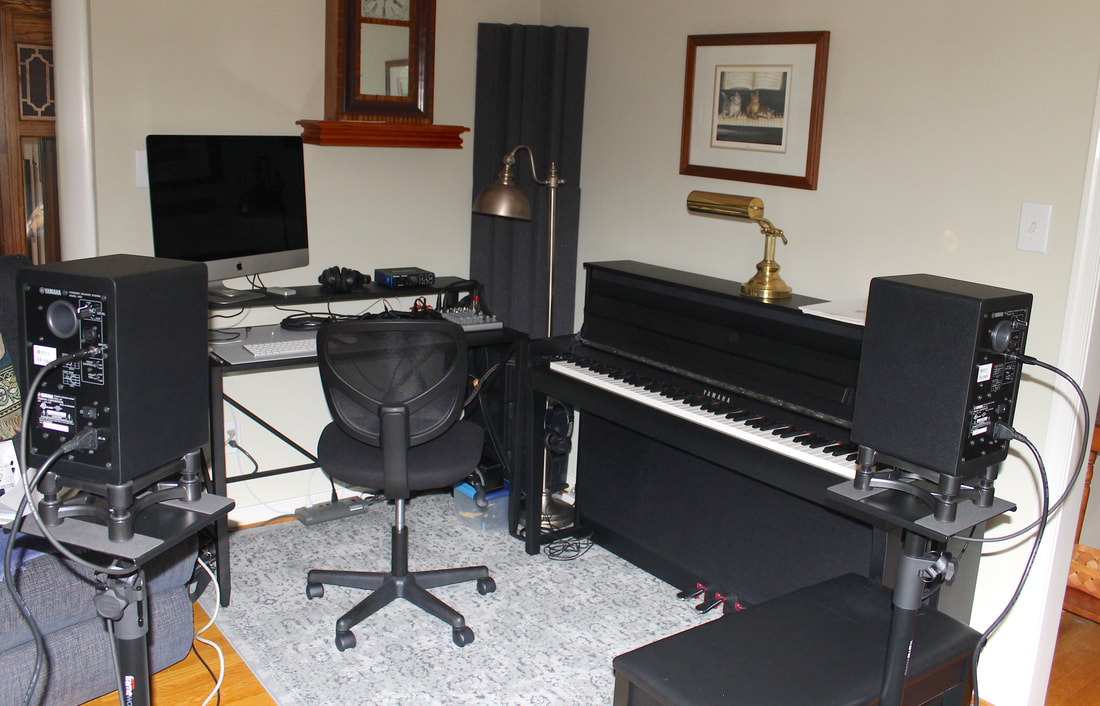
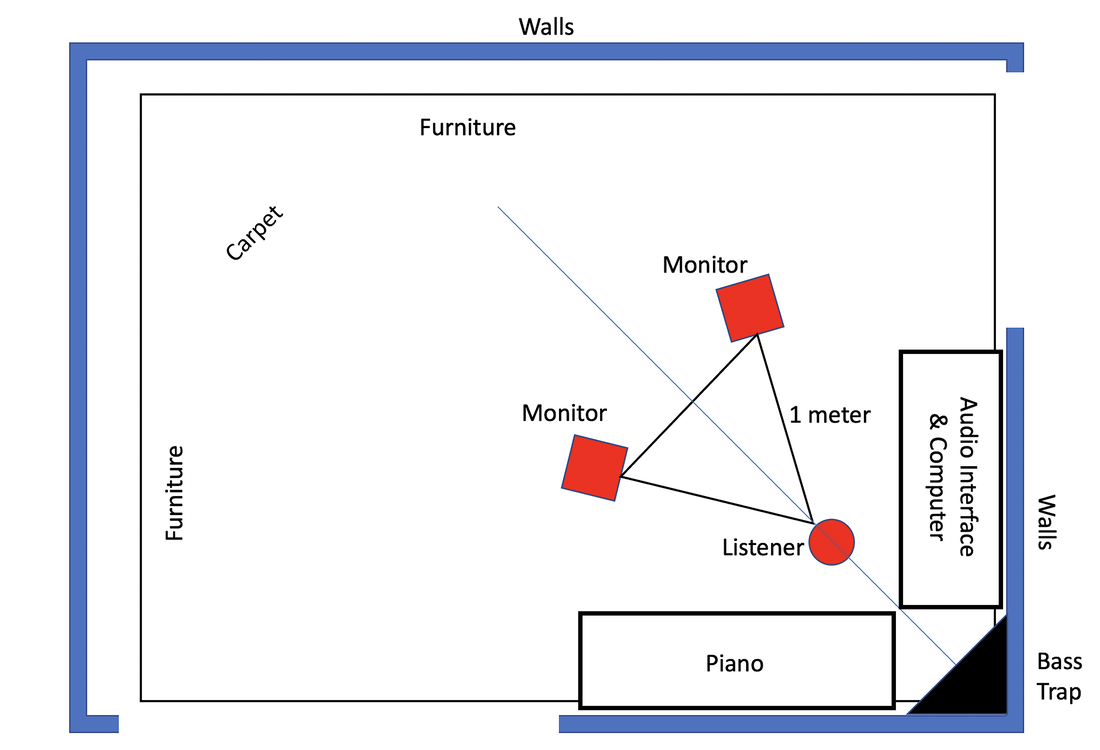
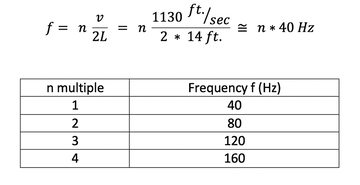
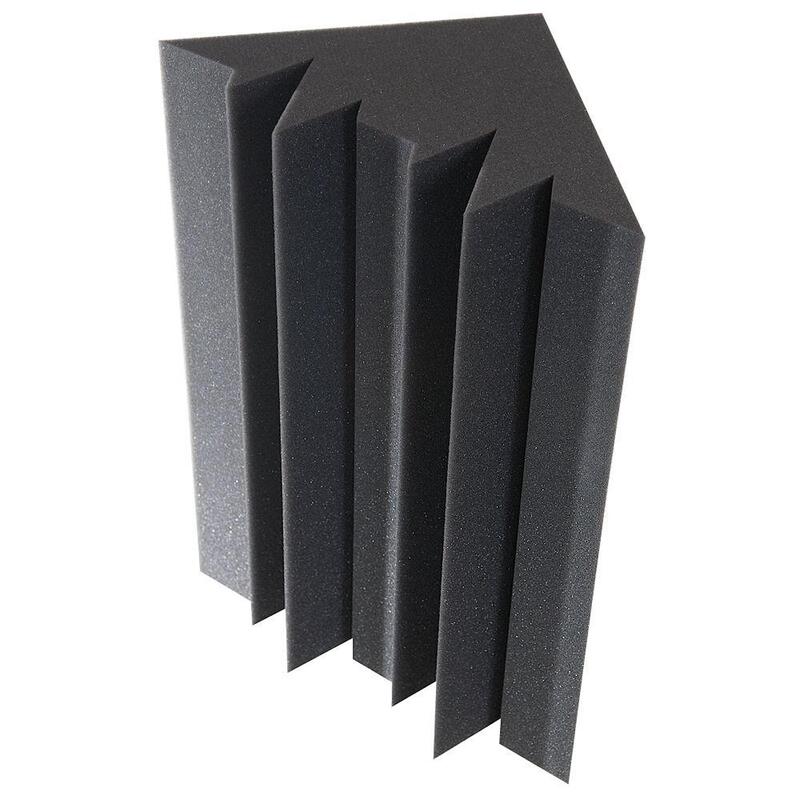
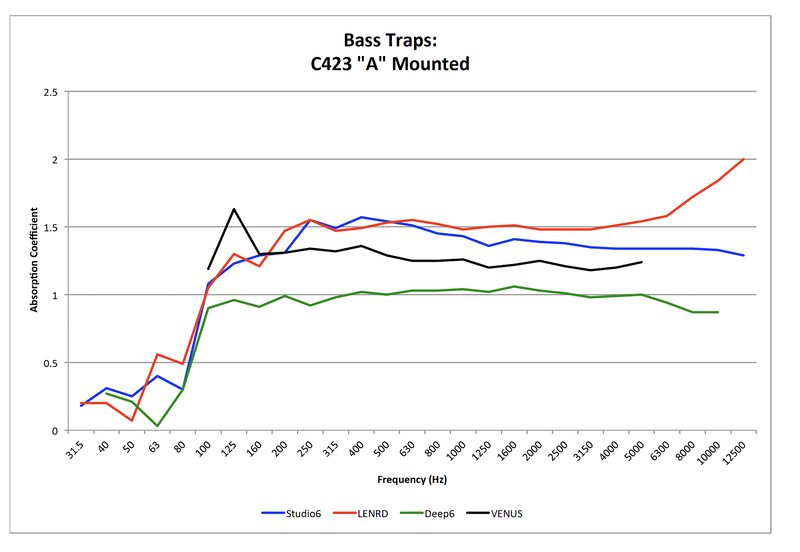
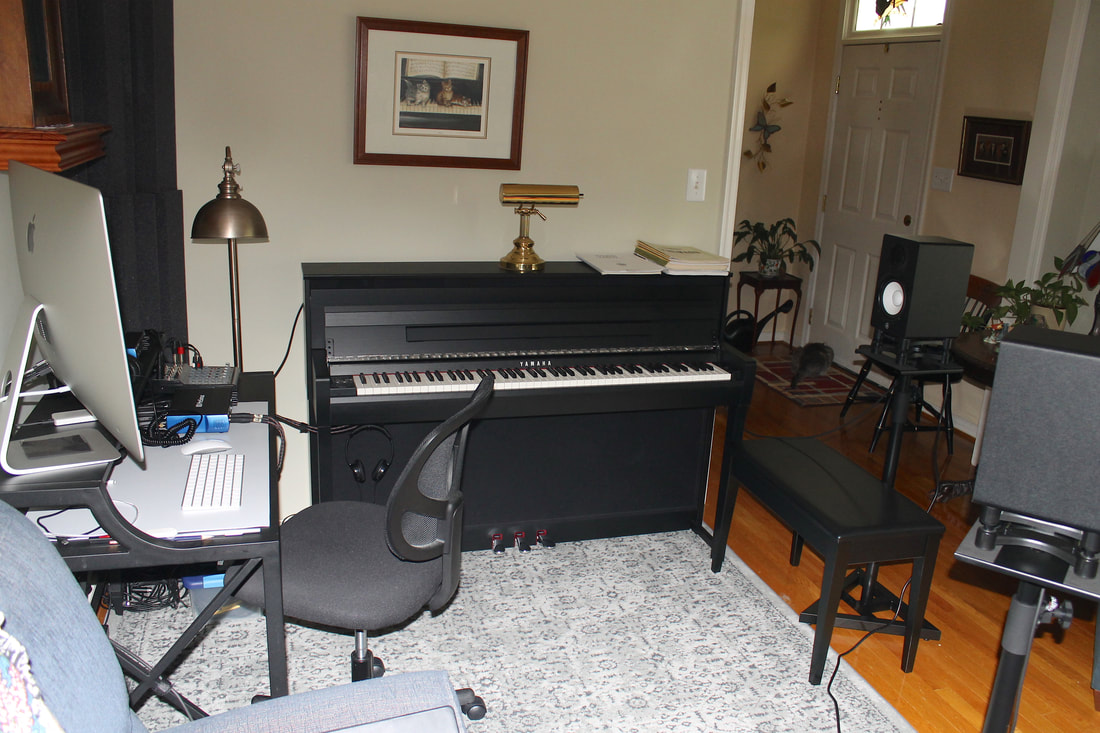
In the last post, we discussed the monitors used to listen to the recorded music. The sound characteristics of these monitors play a key role in achieving good sound mixing and tonal balance in the final tracks. But the sound we hear coming from the monitors is greatly influenced by the acoustics of the room. So it is vitally important to set up the home studio properly so that we can hear the “true” musical sound. We don't want to be “fooled” by acoustic artifacts of the space. A professional studio will design and build the space using standard acoustic guidelines. A home studio is greatly constrained by the fact that selection of available room or space is limited and that there is only a modest budget to fix up the space with appropriate acoustic treatments. Nevertheless, certain ground rules of acoustical physics should be followed in order to create a good listening environment. Some of the more important considerations are listed below. 1. Symmetry Acoustic imaging (ability to discriminate placement and balance in the stereo field) is best when the listener, speakers, walls and other acoustical boundaries are symmetrically centered about the listener’s position. This is particularly challenging if you don’t have available an entire room (like a bedroom) to use for the studio. I was constrained to use just the corner of our living room. After a couple iterations, I settled on the following layout of the sound gear. The two speakers and the listener are at the points of an equilateral triangle – each side is about 1 meter in length. Hence the left and right stereo channels are equidistant from my ears, and I am positioned at the center of the panning image. My monitors are placed on stands in the interior of the room, with the tweeter drivers at the height of my ears while I am sitting in my chair. The tip of the triangle at my position is pointed symmetrically (along the 45-degree angle line shown) into the corner of the living room. Any first-order reflections of the sound waves from each speaker off its nearest wall are also equidistant to my ears, so the time delay is also equal. Ideally, I would have sound absorber panels on the walls at these “mirror points”, but there is at least some “stuff” (like the piano, sound gear table and wall mountings) in the pathways, reducing the specular reflection of these waves. 2. Standing Wave Effects Sound waves reflect quite well off flat solid surfaces, like room walls, and the resulting interference pattern of incident and reflected waves creates “hot” and “cold” spots, playing havoc with the frequency balance in the room. (i.e., the space does not exhibit a relatively flat frequency response over the audio spectrum at all positions in the room.) Parallel walls in rectangular rooms are particularly bad in this regard since the size of typical rooms are on the order of multiples of half-wavelengths of the audio signals. As an example, the frequencies that could establish noticeable resonant modes in a room with a 14 ft. separation between parallel walls are given by, At these and higher frequencies, you would detect amplitude peaks and dips (anti-nodes and nodes) in the sound as you moved around the space. In order to avoid this unwanted effect, you want to “break up” the unobstructed path between the two parallel surfaces, so that the wave fronts scatter over a large solid angle. This can be done by inserting complex surfaces throughout the room, or, as is common in studios, by mounting diffusing panels on the walls so that reflecting waves disperse in random directions. In my setup, the sound waves propagate past my listening position into complex surfaces with irregular geometries. This serves to diffuse and absorb the waves, and helps to avoid the formation of standing waves. 3. Bass Buildup Effect Whenever possible, speaker enclosures should be placed at least 2 feet away from the nearest wall and/or corner. This helps reduce the bass buildup that acoustically occurs at boundary and 90-degree corner locations due to wave reflection. (The boundary condition for the sound wave pressure is an anti-node.) This effect was a problem for my setup when I initially had my monitors close to the walls in the corner of my living room. And the effect was exacerbated by the fact that the speaker bass reflex ports (the open apertures in the speaker enclosure) are in the rear of my Yamaha monitors ! Fortunately, my final setup put my monitors on stands, out in the middle of the room, as shown in the drawing above. Since I am pointing my speakers into a corner, I did feel obligated to place “bass traps” in the corner to reduce the bass buildup effect there. I used two Auralex LENRD bass traps to absorb the high sound pressure. This was a fairly inexpensive acoustic treatment to apply. 4. Reverberation
“Reverb” is the persistence of a sound signal after the direct “line of sight” signal has ceased. This time persistence is caused by the large number of multiple reflections that come back to the listener after traveling over many different path lengths with their associated time delays. Reverberation time is characteristic of the “depth” and nature of the space. A music performance in a small recital room sounds vastly different from the same performance in a stone cathedral ! This room ambience is an integral part of the listener’s experience of a live performance, and needs to be captured in the recording. On the other hand, in the music studio control room, where you are doing the mixing and sound engineering, you really don’t want the control room’s reverberation characteristics to obscure the sound that you are carefully listening to. But it would be similarly undesirable to mix in a completely “dead” anechoic chamber. Certainly, the public will listen to the recording in a somewhat “live” room. I feel that my living room, with a modest amount of furniture, wall treatments and carpeting, has a warm subtle ambience suited for mixing using my monitors. |
Categories
All
Archives
May 2023
|
 RSS Feed
